I have now driven over 600 miles in my home-modified electric truck. I have made quite a few enhancements in some areas and am still at square one in others. I am still scratching my head why my range is not as good as I had hoped. I should be getting at least 50 miles per charge but I am only getting 28 highway miles per charge.
Costco batteries have a 75 amp rating of 115 minutes. When I am cruising on the highway at 50mph, my sustained current draw is about 120 amps. If I were to conservatively assume that my batteries will only last 60 minutes while pulling 120 amps, I should still be able to go 50 miles before they are discharged. For some reason, I am killing them early. Perhaps it's the periods when I am pulling more amps (like going up a hill or accelerating to freeway speed). But then there are also times when I am coasting down a hill or using the breaks where I am consuming no power. Hmmm.
I found one of my batteries had a lot lower voltage than the others. Even after equalizing all of them, when the truck was discharged to 30%, this one battery still showed very low voltage.
I also found several batteries had loose connections. While tightening them up, one of the posts ripped out of one of the batteries. I returned both batteries to Costco and got replacement ones. I also bought a battery load tester at Harbor Freight so I could determine if any more batteries were dead.
~~~~~~~~
I replaced my clutch plate, disk and thrust bearing. Now I have a working clutch. It is possible to shift without a clutch but with an electric motor, you have to be patient while the it spins down to a low enough RPM for the shifter to fall into the next higher gear. Now with a working clutch, I can shift nearly as fast as in a normal gas car.
I built a better motor mount after my first one broke at the welds. This 2nd mount uses a wide piece of flat steel to carry the weight of the motor and a Tee shaped piece of steel fastened to the firewall to keep the motor from twisting under high torque. This tee mount held the motor great but caused lots of transmission noise to resonate into the cab of the truck. I removed the tee and replaced it with a light weight, 1” wide metal strap screwed into the truck frame. No more resonance but now the strap is causing an annoying squeaking sound every time the motor tries to twist under torque, I learned that the twisting force on the motor is quite high and after 50 miles, it snapped a spot weld off of the strap.
Onto plan “D”. I welded 2 pieces of flat metal from the flat metal motor strap to the motor itself. Bingo! No more squeak and no more resonance. So far so good.
More recently, my flywheel has started making a lot of vibration at higher rpm's. It's kind of annoying and detracts from the quiet ride of the electric truck. I am waiting for the weekend to pull the engine back apart to have a look inside. That's the good thing about EVs. They are super easy to work on. One hour of work and the whole motor is out. 90 minutes later and everything is back together again. No oily grease, no seals to worry about, no fluids to drain, no filters, no fuss.
I replaced the 6 pack of large 50uF capacitors (that looked like a 6-pack of soda) with 4 smaller footprint 200uF capacitors.
This allowed me to have a lightweight on-board battery charger with higher charge current (7-19 Amps depending on the batteries state of charge) and smaller footprint size. They get kind of hot when the batteries are charging at the fastest 19Amp rate. I may have to install a small fan on them so they don't dry out.
I built a nice battery box to cover up all the batteries in the truck bed. It looks very unassuming until you peek inside.
Thursday, September 29, 2011
Saturday, September 10, 2011
Installing the Controller and Wiring
A friend of mine gave me an old broken Curtis motor controller. I spent about $70 in parts and a couple hours replacing a dozen burnt out MOSFETs and power diodes. Sadly when I powered it on, it was still not operational. Oh well, it was worth the gamble. I forked over the money to buy a bran new one.
I proved out a concept that I read about on line where you modify a standard ATX computer power supply to take in 120 volts direct current and it will put out 12VDC. This will come in handy for powering all the 12 volt systems on the truck, (headlights, horn, radio, signals, relays, etc) without needing an extra 12 volt battery and additional charger.
I found a nice metal box at NPS for $8 to hold all the electrical parts. I drilled some holes, primed it, painted it white and mounted things up. Here it is being assembled in the mad science lab in my basement.
Here is the white box of parts that makes an electric truck tick. The big yellow thing that looks like a bomb is actually a capacitor array that I am using in a circuit for an experimental quick charger.
Trying It All Out:
On Friday Sept 2nd, 2011, I took the truck out for its maiden voyage. Initially, it drove great. I got it up to 40mph in 2nd gear. You can watch the video here.
There were a few bugs that I still needed to work out.
- The welded motor mounts broke and had to be redesigned and rebuilt.
- The motor speed controller needs a larger heat-sink. It overheated after 10 miles.
- The clutch still doesn't work well, although it isn't needed in an EV.
- The controller is a little sluggish at take off. I need to adjust it so I get more power while accelerating.
For more info on my electric truck, click here.
My electric truck can go up to 40mph in 2nd gear and up to 70mph in 3rd gear. It's range is still limited by the battery pack to about 40 miles. Before I can use it as a commuter truck, I need to break in the motor and the pack. I hope to have a 70 mile range by the time I finish tweaking everything.
To date, I have driven the truck over 120 miles. That's pretty cool considering all my electricity is generated by the power of the sun. In effect, this makes the truck solar powered.
Thursday, September 8, 2011
Mounting The Batteries
I needed a good way to hold 20 batteries securely in the truck without them bouncing all around.
I recently acquired a 230Amp welder off of ksl for $120. It even came with 40 lbs of welding rod and a welding hood. Nice!
I bought some angled and flat pieces of steel and starting cutting them up to make a battery tray that would hold 4 golf cart batteries in the front of the engine compartment.
I welded the pieces together, grinded them smooth, primed them and painted them. The angled edges hold the batteries fairly securely and prevent them from shifting around. A foam piece pressed against the hood of the truck finishes off the mount. Here's a video of me cutting and welding the battery tray.
I made two more battery trays, each can hold 8 batteries.
These larger trays mount in the front of the truck bed close to the cab.
I went to Costco to price out golf cart batteries. You can buy Trojan batteries for $149 each plus core charge. Costco had an equivalent capacity battery for only $79. I bought 14 of them on the spot and another 6 a week later. I found a 50 foot length of 00 welding cable on Ebay for $155, and built up all the cables needed to connect all 20 golf cart batteries in series.
I recently acquired a 230Amp welder off of ksl for $120. It even came with 40 lbs of welding rod and a welding hood. Nice!
I bought some angled and flat pieces of steel and starting cutting them up to make a battery tray that would hold 4 golf cart batteries in the front of the engine compartment.
I welded the pieces together, grinded them smooth, primed them and painted them. The angled edges hold the batteries fairly securely and prevent them from shifting around. A foam piece pressed against the hood of the truck finishes off the mount. Here's a video of me cutting and welding the battery tray.
I made two more battery trays, each can hold 8 batteries.
These larger trays mount in the front of the truck bed close to the cab.
I went to Costco to price out golf cart batteries. You can buy Trojan batteries for $149 each plus core charge. Costco had an equivalent capacity battery for only $79. I bought 14 of them on the spot and another 6 a week later. I found a 50 foot length of 00 welding cable on Ebay for $155, and built up all the cables needed to connect all 20 golf cart batteries in series.
Sunday, August 28, 2011
My Electric Lawn Mower named Frankenstein:
NPS has got to be one of my favorite places to find deals. Any store that sells nuts and bolts by weight is alright in my book. The other day, I happened across a bunch of small 6-volt rechargeable AGM batteries. Most of them were priced at $1.08 each. I have walked by this isle many times before but for some reason, today, I got an epiphany!
“Why not buy 20 of these little guys and string them all together into a 120 volt battery pack?”
Not only would it be a useful test bed for repairing the controller in my electric truck, but I could also modify my electric lawn mower to run on this battery pack instead of the heavy 12 volt deep cycle battery it currently uses.
My electric lawn mower runs great, but it is really heavy and a huge workout pushing it around my ½ acre yard each week. It has a large 115Amp-Hour, 12 volt battery that powers an inverter, that converts the 12 volt DC up to 120 volts AC, which is then rectified to high voltage DC, which then powers a DC motor. Each conversion has some efficiency loss.
In order to provide enough power to cut a thick green lawn, the 12 Volt battery has to be able to deliver 80 Amps continuously. There is a phenomenon in all batteries called “The Peukert effect” which causes a large battery delivering a lot of amps to act like a lower capacity battery.
For example, If you have a 100 Amp-hour battery, it will provide 1 amp continuously for 100 hours. But if that same battery tried to deliver 100 amps for 1 hour, it wouldn't last for 1 hour like we had hoped. Because of the Peukert effect, it may only last 40 minutes or so depending on the battery chemistry and age of the battery. CURSE YOU PEUKERT EFFECT!!!
A power inverter is a marvelous invention that converts 12 volts DC to 120 volts AC. Like everything else in the universe, work comes at a price. The inverter used on my lawn mower has about a 5-15% efficiency loss involved in the conversion. When the battery is ½ discharged, and while under load, the voltage drops below 10.5 volts and the inverter goes into a low voltage alarm state, shutting itself down. I can still have enough capacity to mow my lawn using this battery, but it bothers me that I am pushing around an extra 20 lbs of lead with no way of extracting the energy out of it.
In addition to the small losses of the bridge rectifier, at 157 Volts, the rectified DC doesn't run the motor at it's top speed either.
By using a 120 Volt DC battery pack, the current draw from the battery will be in the 2 to 5 Amp range, not 60-90 Amps like with a 12 volt battery. Also, because the 120 Volt DC is true DC, and not rectified, unfiltered DC, the motor will run at its full speed.
When the pack starts to discharge, instead of shutting off completely, the motor just spins a little bit slower.
A few months ago, I discussed how reducing resistive losses in the battery-inverter wiring allowed an extra 15 minutes of run-time before the inverter would shut down. That worked great but it's time I take it a step further.
Before:
12 Volt 115Amp-Hour deep-cycle battery. 50.2 lbs (plus inverter and wire 3.4 lbs).
12 X 115 = 1380 Watt-hours, or about 13 cents worth of electricity.
After:
Twenty 6 Volt 4.5Amp-Hour AGM batteries. 32.4 lbs
20 X 6 X 4.5 = 540 Watt-hours, or about 5 cents worth of electricity.
Both designs mow the lawn just fine, but for a manually propelled lawn mower, the 21.2 pound weight loss is a night and day difference. By pushing around less weight, it takes me less time to mow my lawn. 1 hour 5 minutes down to ~52 minutes.
“Why not buy 20 of these little guys and string them all together into a 120 volt battery pack?”
Not only would it be a useful test bed for repairing the controller in my electric truck, but I could also modify my electric lawn mower to run on this battery pack instead of the heavy 12 volt deep cycle battery it currently uses.
My electric lawn mower runs great, but it is really heavy and a huge workout pushing it around my ½ acre yard each week. It has a large 115Amp-Hour, 12 volt battery that powers an inverter, that converts the 12 volt DC up to 120 volts AC, which is then rectified to high voltage DC, which then powers a DC motor. Each conversion has some efficiency loss.
In order to provide enough power to cut a thick green lawn, the 12 Volt battery has to be able to deliver 80 Amps continuously. There is a phenomenon in all batteries called “The Peukert effect” which causes a large battery delivering a lot of amps to act like a lower capacity battery.
For example, If you have a 100 Amp-hour battery, it will provide 1 amp continuously for 100 hours. But if that same battery tried to deliver 100 amps for 1 hour, it wouldn't last for 1 hour like we had hoped. Because of the Peukert effect, it may only last 40 minutes or so depending on the battery chemistry and age of the battery. CURSE YOU PEUKERT EFFECT!!!
A power inverter is a marvelous invention that converts 12 volts DC to 120 volts AC. Like everything else in the universe, work comes at a price. The inverter used on my lawn mower has about a 5-15% efficiency loss involved in the conversion. When the battery is ½ discharged, and while under load, the voltage drops below 10.5 volts and the inverter goes into a low voltage alarm state, shutting itself down. I can still have enough capacity to mow my lawn using this battery, but it bothers me that I am pushing around an extra 20 lbs of lead with no way of extracting the energy out of it.
In addition to the small losses of the bridge rectifier, at 157 Volts, the rectified DC doesn't run the motor at it's top speed either.
By using a 120 Volt DC battery pack, the current draw from the battery will be in the 2 to 5 Amp range, not 60-90 Amps like with a 12 volt battery. Also, because the 120 Volt DC is true DC, and not rectified, unfiltered DC, the motor will run at its full speed.
When the pack starts to discharge, instead of shutting off completely, the motor just spins a little bit slower.
A few months ago, I discussed how reducing resistive losses in the battery-inverter wiring allowed an extra 15 minutes of run-time before the inverter would shut down. That worked great but it's time I take it a step further.
Before:
12 Volt 115Amp-Hour deep-cycle battery. 50.2 lbs (plus inverter and wire 3.4 lbs).
12 X 115 = 1380 Watt-hours, or about 13 cents worth of electricity.
After:
Twenty 6 Volt 4.5Amp-Hour AGM batteries. 32.4 lbs
20 X 6 X 4.5 = 540 Watt-hours, or about 5 cents worth of electricity.
Both designs mow the lawn just fine, but for a manually propelled lawn mower, the 21.2 pound weight loss is a night and day difference. By pushing around less weight, it takes me less time to mow my lawn. 1 hour 5 minutes down to ~52 minutes.
Monday, August 22, 2011
EV Conversion Part 3 – Installing the Electric Motor:
It’s amazing to me how simple a job can become when you have the right tools, good lighting and room to work.
Mandatory tools for an EV conversion job:
- A place to perform the EV conversion, (for 200 hours or 2-6 months).
- Impact wrench with deep walled sockets
- Engine lift or cherry picker
- Arc welder
- Angle grinder
- Chop Saw with metal blade
- Drill press
- Paint sprayer
- Neoprene gloves x100 pair or more if you have OCD like me.
I bought a large DC electric motor and a generic adapter plate for connecting the motor to the transmission bell housing. I tested out the DC motor with a 12 volt battery to verify it works.
I lined up the motor with the adapter plate and clamped it in place.
Yeah, that kind of looks like blood but its spray paint from my first attempt at matching up the holes on the transmission bell housing. I drilled holes that matched my specific transmission.
I also had a shaft coupler machined that would match the shaft of the electric motor to the existing fly-wheel from the old engine. I still want the clutch intact for this EV conversion.
By grinding down a raspy metal file, I made a key for the motor shaft to lock into the coupler.
I used a couple extra hunks of metal from the old engine to secure the motor in place. I welded them to the motor and bolted them to the frame of the truck.
Wow! I now have a truck with an electric motor. I have to drive this around the block.
I connected up two 12-volt batteries in series and connected them to the motor with jumper cables. Using one end of a jumper cable for an instant on/off throttle control, ZAP, the truck came to life!
I drove it down the street a few of times at the screaming speed of 10mph. Check out this video clip of me test driving it here.
I really need to get more batteries and install the motor controller. Eventually this truck will drive at freeway speeds.
Thursday, August 18, 2011
EV Conversion Part 2 – Making it look nice:
After I pulled out all the parts from the internal combustion engine, I took a good look at the truck carcass that remained. It was dirty, rusty and kind of ugly. Since I was making such a large investment in a vehicle that I will be driving for the next 5-10 years, I decided to spend some extra time and make it look nice.
I washed off all the grease, pulled off the bed, sanded down the frame and primed all bare and rusty metal.
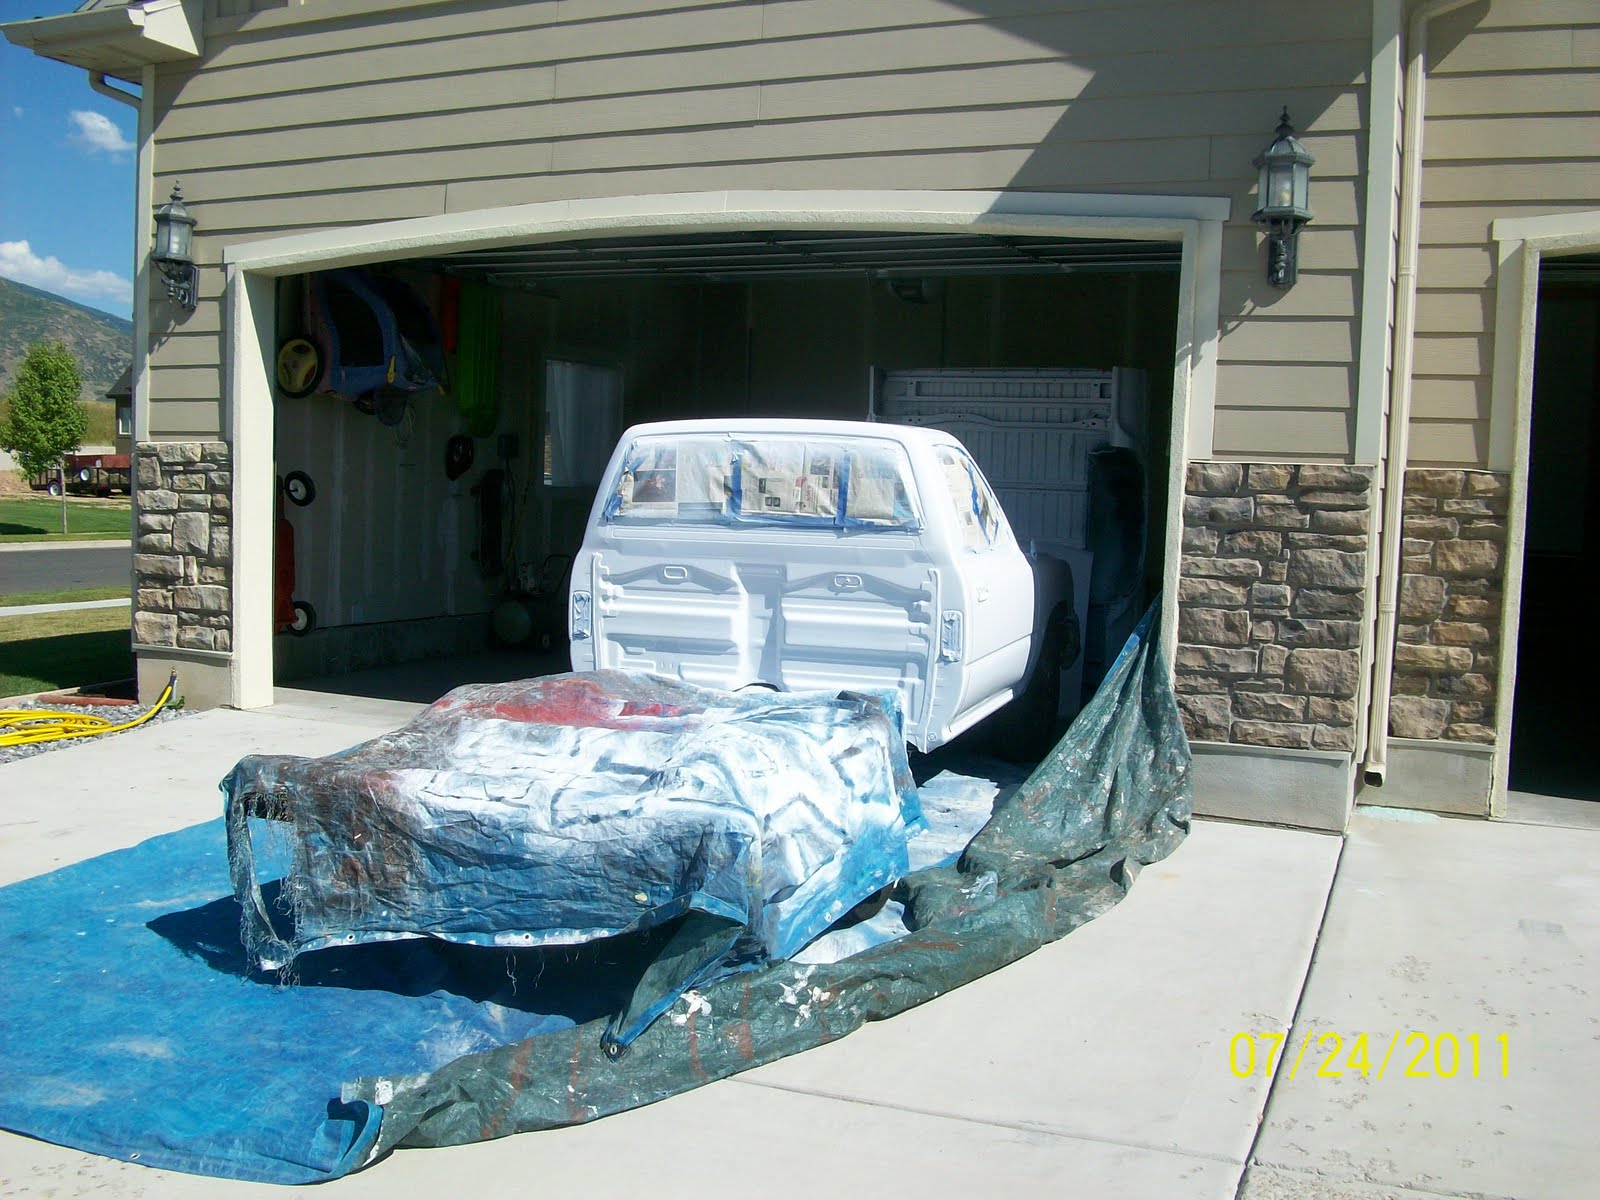
After that, I painted the frame a shiny black color. Once that paint had cured, I taped off all the glass and painted the truck with an air sprayer. It took 2 hours to tape everything off and only 15 minutes to spray the paint on.
I’m no expert in auto body paint but the paint job turned out very nice.
It was so easy, (relatively) that I now want to re-paint my 1992 Honda Accord.
They have so many wonderful hues and colors of paint now days. I believe the color of my car is called, “Fading, cracking vomit.” I’m going to re-paint it “Tree Hugger” green.
I washed off all the grease, pulled off the bed, sanded down the frame and primed all bare and rusty metal.
After that, I painted the frame a shiny black color. Once that paint had cured, I taped off all the glass and painted the truck with an air sprayer. It took 2 hours to tape everything off and only 15 minutes to spray the paint on.
I’m no expert in auto body paint but the paint job turned out very nice.
It was so easy, (relatively) that I now want to re-paint my 1992 Honda Accord.
They have so many wonderful hues and colors of paint now days. I believe the color of my car is called, “Fading, cracking vomit.” I’m going to re-paint it “Tree Hugger” green.
Wednesday, August 17, 2011
Electric Car Conversion Part 1 – The Donor Vehicle and The ICE Removal:
In 2008, I bought an old Geo Metro for $1 for the purpose of converting it to an all electric car. I calculated it would have a 40 mile range and only cost me $3000 in parts. It would be the perfect commuter car, requiring only $0.67 cents in electric fuel to get me back and forth to work each day.
A Geo Metro has a light frame but has little room for extra weight. A pickup truck is relatively lightweight but has a stronger frame that can handle additional battery weight.
Unfortunately, my enthusiasm for the project faded when we moved to another house out of the range of the car's design.
Fast Forward 3 years:
My desire for an Electric Vehicle was rekindled by the announcement of the Nissan Leaf. But after nearly a year sitting on the waiting list, I opted to roll my own, again.
I have read that the an electric vehicle will have greater range if it can carry more batteries. It makes sense. More fuel = more range.
A Geo Metro has a light frame but has little room for extra weight. A pickup truck is relatively lightweight but has a stronger frame that can handle additional battery weight.
In June 2011, I acquired a 1992 Toyota Pickup Truck. Although the mileage was high, it was in good cosmetic condition.
I ripped out all the “unnecessary” parts. The internal combustion engine, radiator, gas tank and the exhaust system.
This lightened the truck weight by 500 lbs and freed up a lot of room in the engine compartment for an electric motor and batteries.
Subscribe to:
Posts (Atom)